Stopwatch JavaScript Source Code
Are you looking to add a stopwatch or timer to your website? A stopwatch is a simple yet powerful tool that can help keep track of time in various scenarios, such as sporting events, cooking, or simply timing an activity. With JavaScript, it’s easy to create a stopwatch that can be embedded into your website. In this article, we’ll show you how to create a stopwatch JavaScript source code that you can use on your website.

Stopwatch JavaScript Source Code
Introduction: What is a Stopwatch and Why You Need One
A stopwatch is a simple device that can be used to measure elapsed time. It is often used in sports, scientific experiments, and other activities where timing is crucial. In the digital age, a stopwatch can be implemented as a JavaScript function that can be embedded into your website, making it easy to use and accessible to your visitors.
Adding a stopwatch to your website can be useful in many scenarios. For example, you can use it to time a quiz or test, measure the duration of a video, or even to time how long it takes for your website to load. It can also be used as a simple timer for games or other activities.
Getting Started: Creating a Basic HTML File
Before we start building our stopwatch, we need to create a basic HTML file that we can use as a foundation. Here’s an example of what our HTML file should look like:
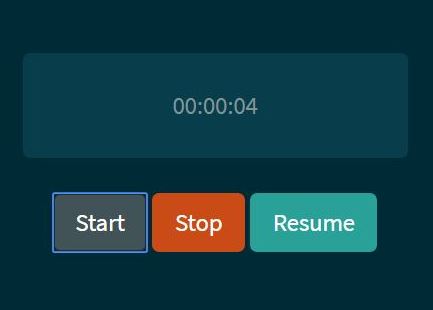
This HTML code creates a simple web page with a heading, a stopwatch display area, and three buttons: Start, Stop, and Reset.
Adding JavaScript: Building the Stopwatch Functionality
Now that we have our HTML file set up, we can start adding JavaScript to make our stopwatch work. Here’s an example of the JavaScript code we’ll be using:
This JavaScript code defines three variables: seconds, minutes, and hours. It also defines a function called add() that increments the seconds, minutes, and hours variables and updates the stopwatch display area with the new time. Another function called timer() is also defined, which sets a timer using setTimeout() that calls the add() function every second.
To get the stopwatch to start, we’ll need to add event listeners to the Start, Stop, and Reset buttons. Here’s the code to do that:
This code uses addEventListener() to add event listeners to the Start, Stop, and Reset buttons. When the Start button is clicked, the timer() function is called to start the stopwatch. When the Stop button is clicked, the timer is stopped using clearTimeout(). When the Reset button is clicked, the timer is stopped and the seconds, minutes, and hours variables are reset to zero. The stopwatch display area is also updated to show the reset time.
Styling Your Stopwatch: Adding CSS to Make It Look Great
Now that we have our stopwatch functionality working, we can add some CSS to make it look great. Here’s an example of the CSS we’ll be using:
This CSS code defines styles for the stopwatch display area and the buttons. It sets the font size and weight of the stopwatch display area, centers it on the page, and adds some spacing between it and the buttons. It also sets the font size and padding of the buttons and adds some spacing between them.
Advanced Features: Adding Lap Times and Split Times
Now that we have a basic stopwatch working, we can add some advanced features, such as lap times and split times. Lap times are the time it takes to complete a single lap, while split times are the time it takes to complete a section of the activity. Here’s an example of how to add lap times and split times to our stopwatch:
This JavaScript code defines a new variable called lapTimes that will store the lap times. It also defines two new functions: addLap() and addSplit(). The addLap() function pushes the current time onto the lapTimes array and updates a new <ul> element with the lap times. The addSplit() function updates a separate display area with the current split time.
We’ve also added event listeners to two new buttons: Lap and Split. When the Lap button is clicked, the addLap() function is called to add the current time to the lap times. When the Split button is clicked, the addSplit() function is called to update the split time display area.
Debugging Your Code: Troubleshooting Common Issues
As with any code, there may be issues that arise when building a stopwatch. Here are a few common issues and how to troubleshoot them:
- The stopwatch doesn’t start when the Start button is clicked: Double-check that the event listener for the Start button is set up correctly and that the
timer()function is being called when the Start button is clicked. - The stopwatch doesn’t stop when the Stop button is clicked: Double-check that the event listener for the Stop button is set up correctly and that
clearTimeout()is being called when the Stop button is clicked. - The lap times or split times aren’t displaying correctly: Double-check that the variables and functions are set up correctly and that the display areas are being updated correctly.
Testing Your Stopwatch: Making Sure It Works Correctly
Once you’ve built your stopwatch, it’s important to test it to make sure it works correctly. Here are a few things to test:
- Starting and stopping the stopwatch: Make sure that the stopwatch starts when the Start button is clicked and stops when the Stop button is clicked.
- Resetting the stopwatch: Make sure that the stopwatch is reset to zero when the Reset button is clicked.
- Adding lap times: Make sure that the lap times are added correctly when the Lap button is clicked.
- Adding split times: Make sure that the split times are added correctly when the Split button is clicked.
Integrating Your Stopwatch: Embedding It into Your Website
Now that you have a working stopwatch, you can embed it into your website. To do this, simply copy and paste the HTML, CSS, and JavaScript code into your website’s code.
Cross-Browser Compatibility: Ensuring Your Stopwatch Works on All Browsers
It’s important to ensure that your stopwatch works on all browsers. To do this, test your stopwatch on different browsers and make any necessary changes to the code.
Conclusion: Wrapping It Up
In this article, we’ve shown you how to build a stopwatch JavaScript source code that you can embed into your website. We’ve covered the basics of creating a stopwatch, adding advanced features like lap times and split times, and troubleshooting common issues. With this knowledge, you can create a stopwatch that is both functional and stylish for your website.
FAQs
Q1. How can I change the font style of the stopwatch display area?
A1. You can change the font style by adding CSS code to the #stopwatch selector in your CSS file.
Q2. Can I add more buttons to the stopwatch?
A2. Yes, you can add more buttons by creating new buttons in your HTML file and adding event listeners to them in your JavaScript file.
Q3. How can I make the stopwatch look more stylish?
A3. You can make the stopwatch look more stylish by adding CSS code to style the display area and buttons. You can also add images or animations to make it more visually appealing.
Q4. How can I make the stopwatch more accurate?
A4. To make the stopwatch more accurate, you can increase the frequency of the timer function by reducing the timeout value in the timer() function.
Q5. Can I use this stopwatch for commercial purposes?
A5. Yes, you can use this stopwatch for commercial purposes as long as you attribute the source code to the original author and don’t claim it as your own work.
Get Access Now
Now that you’ve learned how to build a stopwatch JavaScript source code, it’s time to put your knowledge to the test. Get started today by embedding a stopwatch into your website and see how it can enhance the user experience.
External resources related to the topic of building a stopwatch with JavaScript:


Leave A Comment
You must be logged in to post a comment.